Jul 24, 2011

one hundred & twenty three.

I was recently asked by one of my beautiful readers to do a step by step on how to fake tan!

...

Fake tanning seems to be hated by some, overdone by many & loved by too few!

I'm naturally quite pale, in fact flourescent if don't see sun for a while, but I don't want to subject myself to the sun too often to rely on getting a tan!

I have done so many make ups on 30 something women who have CLEARLY overdone the whole sunbaking thing...  & trust me, their skin is not good.
It gets this hideous leathery feel to it, age spots set in prematurely, & not to mention, their wrinkles are multiplied!

Don't get me wrong, seeing sunlight is definitely a good thing, just don't subject yourself to it for so long that you get an impressive tan!

Leather handbags are great. Leathery skin is not. 

So i say...
Fake it 'til you make it!

Firstly,  have a shower!
While you're in there, exfoliate your entire body.
I use Lux Exfoliating Body Wash (because it smells so delicious!!) with an exfoliating glove.
Rinse yourself off!
Dry yourself thoroughly & moisturize your toes & hands. If you have dry scaly skin on your elbows, ankles & knees, moisturize them as well!

Wait around 20 minutes for the moisturizer to soak in, then start applying your tan!
I use Le Tan Instant Foaming Mousse in Deep Bronze & Bronze & I will explain how to put both colours to good use!
Start by doing your feet with the Bronze (which is the lighter colour out of the two) & apply it all over, taking good care to cover every toe & around your ankles.
Then get the Deep Bronze (the darker colour) & do your legs, torso & arms. 
Use a strong sweeping motion, but don't rub it in too much so your skin can absorb the colour evenly.

Make sure you don't miss any parts of your body! You don't want to look blotchy!

Then grab the Bronze & cover your neck, face & ears, making sure to get every nook & cranny.
(Definitely do your neck, but doing your face is optional. Just make sure if you don't do it, you use a darker foundation to match your body)

I've noticed that there is one small patch of skin on my back that i can't reach very well.. If you have the same issue, grab a friend/partner/relative to do that part for you,
OR do my little trick- Instead of pumping the foam into the palm of your hand, pump it onto the back and spread it out so that you can reach up to that section with the flat, back of your hand rather than a wonky hand & a few little fingers.. which obviously leaves finger marks!

If you don't want your tan to be too dark. Skip the next step & jump to the last!

If you want to look like you've been holidaying in Hawaii, wait 20 minutes for the first layer of tan to dry, then repeat the entire process! 
You can do your entire body for the second time with the Bronze if you don't want to apply more of the Deep Bronze. 
That part is totally up to you & how dark you want to be.

Finish by washing your hands thoroughly with soap, making sure you wash properly between your fingers! Then grab the Bronze & pump a little onto my hands & wipe the insides VERY thoroughly with a baby wipe so they can blend in with the rest of my tan & my palms don't go orange.
Now go stand in front of a heater, fire, blow dryer to help speed up the drying process & send yourself to bed!

The next day you will wake up beautiful & bronzed!
Yaaaay!

Jump in the shower (if you don't do it overnight make sure you wait AT LEAST 8 hours before showering) & wash the excess tan off with a body wash (NOT an exfoliating one).
Then smother yourself with a yummy smelling moisturizer to cover the smell of fake tan!
I use Cocoa Butter, because I'm obsessed with it!

I repeat this entire process usually once a week.

During the week, moisturize yourself every day, in fact, twice a day if you can & apply either some gradual tan or the Bronze tan every three or four days to maintain your colour!

Losing your tan is very easy! 
I learnt this after frying myself in Bali a few years ago (tsk tsk. naughty Rachael) . I went to so much effort to get a tan which i was super excited about, then 2 weeks later I had a spa.. 
When i got out, i was white again & the bubbles were brown!

So here are my tips for a lasting tan..
DO NOT HAVE A SPA!!!!
Cut your showers down to 5 minutes.
In fact, don't spend too much time in water in general. 
Don't go rubbing yourself dry with your towel, instead pat yourself dry!
& moisturize, moisturize, moisturize! especially in winter!


Enjoy the healthy feeling of being tanned & think of the world of good you're doing to your skin (& body) by avoiding all that sun baking!!!

xx

Jul 21, 2011

one hundred & twenty two.

 Check out some of my latest work!


Campaign images for the beautiful label 
& the look book for their Nostalgic Exposition range.

Behind the scenes from this shoot are coming soon...

one hundred & twenty one.

Here are a couple of 
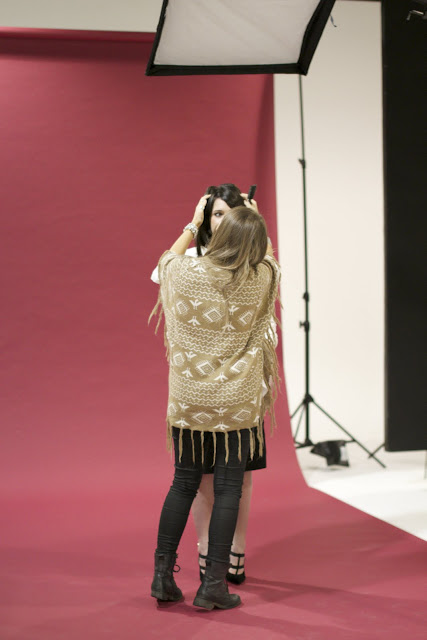
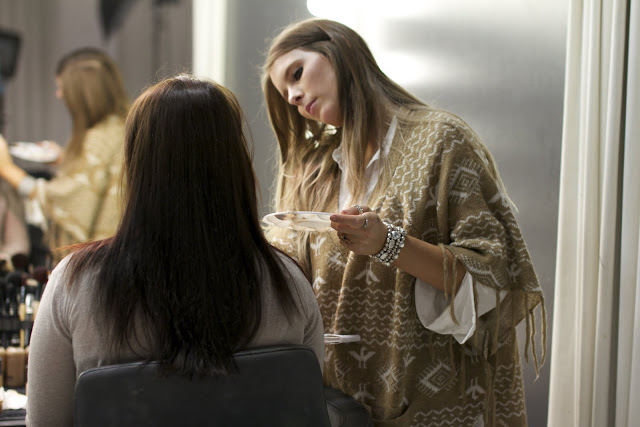
Behind The Scenes shots that i found floating around on google,
from the Red Undies Week photo shoot that i worked on!

Doing Jessica Maloney's hair.
That's me in my favourite grey snuggy cape!  
Amanda Hinchcliffe, Tyler Atkins & one of Amanda's lovely friends!


Jul 20, 2011

one hundred & twenty.

In winter, i like to use a moisturizer that's thicker than my usual Cetaphil,

so that i feel like the cold weather won't be able to sneak in & dry my skin out!

So lately I've been using 

Shu Uemura's Depsea Hydrability Moisturizing Cream.

And I'm absolutely LOVING it!

I only wear it at night when I'm going to bed 
& it feels so lovely & thick & nourishing!

I then wake up in the morning with the softest, most beautiful skin with this fabulous healthy glow!

It's definitely worth a try for all you (possibly dry & scaly) winter snow bunnies out there!
xx

one hundred & nineteen.

The one product i buy more than anything is..

BABY WIPES!

Thats right.

Good old fashioned... 
 
fragrance free.. 
 
10 bucks a packet...
 
Baby Wipes.

They're the only thing i can trust to be gentle on even the most sensitive skin!
 
I use them twice a day!

In the morning to prepare my skin for applying make up
(or whenever i decide to wake up.. 
which is usually really the afternoon if i have a choice,
but to make my point, i'll say morning)
& at night to remove my make up!

I suggest everyone who spends hundreds of dollars a month on their 
"cleansing, toning, moisturizing" products to give them a go!
 
Replace your cleanser/toner with them &
 
you may find that they will do your skin a WORLD of good!


=)

xx

#tipsforbeingextrastingyduringhardtimeswiththebadeconomyblahblah


Jul 15, 2011

one hundred & eighteen.

Reader Question:

"Is it bad to wear foundation every day?"

This all depends on your skin & how it reacts to wearing make up, but no, it's perfectly okay to wear foundation as often as you like!
It's always nice to give your skin a little break from make up to just let it be, but you can do this at night time when you're sleeping!  
Just make sure you take off your make up before going to bed & moisturize your skin to keep it feeling soft & fresh!

In saying that, if your having problems with your skin & it seems to get worse when wearing make up, you may want to check it's not your foundation causing the issues.
I only recommend make up that I have never had any issues with sensitivity when using.
Everyone is different though,  so it's absolutely worth making sure it's not a product you're using on an every day basis that's causing the issue!

one hundred & seventeen.

Reader Question:

"Is eyelash glue bad for your eyes?"

The short answer to this is no.  
Eyelash glue is made to be used around the eyes, so it is absolutely safe!

However, When using eyelash glue to apply false lashes, you should be applying the lashes on top of your own lashes, not on the skin around your eye.
This is how the lashes sit best,
& I can't imagine it would feel good to have glue actually IN your eyes!


I will post a false lashes step by step (with photos!) in a later post!
xx

Jul 13, 2011

one hundred & sixteen.

Life is too short to live the same day twice.

one hundred & fifteen.

Just like with everything you do,

Practice Makes Perfect.

Same goes for doing your make up.

Even though I'm telling you all the tips & tricks I can think of, it doesn't mean you are going to nail everything you try first go.

So try & try again & I promise it will become second nature to you.

That's when you can smile because you've nailed it
=)

one hundred & fourteen.

If your skin is feeling a little dry & dehydrated & you're just about to apply your make up...

Instead of smothering it with moisturizer
(which will make your make up run as fast as it can!)

Spritz some hydrating Rosewater spray all over your face for instant hydration 
& that wonderful moisturized feeling.

It's super gentle & able to be used on the most sensitive of skins.
For a quick Pick Me Up,
You can even spray it very lightly over your make up towards the end of the day,
if it's starting to look a little dull.

Try Kosmea's Hydrating rosewater mist.
That's my fave!

xx

one hundred & thirteen.

Here are some 
Behind The Scenes shots from one of my latest shoots 
for  Cosmopolitan.


Photos taken by Vanessa Low @ themondayissue
xx

Jul 12, 2011

one hundred & twelve

My gorgeous friend Georgia & I at the
Yves Saint Laurent Winter Collection Launch

 
( Photo from The Daily Telegraph )

one hundred & eleven.

LADIES WITH FACIAL HAIR...
LISTEN UP!

IF YOU HAVE A MOUSTACHE,
(image from google)

 !!!!!especially if it resembles one of these!!!!!

PLEASE DO THE RIGHT THING & REMOVE IT.

GET IT WAXED!
or at least get it bleached.

YOU WILL FEEL 100% BETTER WITHOUT THAT HAIRY WORM
SITTING ABOVE YOUR LIP.

TRUST ME.

You will then be able to enjoy all the wonderful things in life.. 
like a beautiful, bold, bright pink lip!

Jul 3, 2011

one hundred & ten.

I know I talk about & recommend a lot of high priced items on here,

& I'm well aware that not everyone has a big budget for their make up collection!

So today I got a few cheaper products to try out

& I will be reviewing them on here over the next few days !


x

Jul 2, 2011

one hundred & nine.

Reader Question:
"I always try to get that perfect balance between smokey eye and 60's cat eye. 
I love top-lined eyes but i hate perfect looking make up, 
i like it a little rough around the edges, a bit rock n roll. 
how can i do this and which products are best?"


Give me a challenge why don't you! haha.
This isn't the simplest of make ups to explain in a post,
Or even to do on yourself.
So i'll take a few rough photos along the way to help keep you on track.

Prep your eyes.
(Baby wipe them to remove all oil. Apply foundation, concealer & translucent powder over the top)
Don't bother doing your foundation until you've finished your eye make up!

Product wise, you can go all out by using a black gel eyeliner with a brush.
MAC 'Blacktrack' gel eyeliner is what I've used.
If you find it easier to use a black pencil that will do the same job, or even a very black eyeshadow.
Using the eyeshadow option will be more likely be smokey than striking.

Draw an imaginary line (or an actual line if that helps) from the side of your nose, to the corner of your eyes & upwards to your temples.
This is the angle your "flick" should be at.
I did this after I'd done the make up just to show you
but you should do it first, as told in the step by step.

Then you have a choice.
Do you want to cover your entire eyelid in black?
If you do,
Put some sticky tape over this imaginary line.
Yes sticky tape.!
It helps you to keep on a straight line.
  Then using your brush cover your eyelid with the black eyeliner,
going into the crease of your eye socket, &  all the way to the end of the sticky tape.


Stay looking down and leave it to dry for a minute.
Or until you get too impatient.
Check to make sure the black is even & heavy enough to your liking
(if it's not you can go over it with the same product you've used or a black eyeshadow)
Then peel off the sticky tape, revealing a heavy black 60s cat eye.
Then grab a smaller brush with some more of your black product of choice & apply to the inner V of your eyes. 


If you don't want to cover your entire eyelid with black, 
place the sticky tape across your eyelid, leading into your imaginary line. 
Cover the space in between your lashes & the tape with your black product & again leave to dry for a minute before checking the colour.


Again, do the inner V corner of your eyes.

Clean up any mess you've made around your eyes, with some cotton tips with foundation on them
& Coat your lashes with lots of mascara!

If you need extra help getting the shape right, put the sticky tape on top of your eyelid as well as on the imaginary line, so there's really no way of going outside the lines!
That will guarantee the perfect flick to suit your eye shape!

Feel free to add on what i've taught you to personalize your look.
Add some extra black to thicken up the flick, or if you wanted it to be a bit thinner, adjust the flick freehand with a brush/cotton tip coated in foundation.

Just like everything you do, practice makes perfect & the same goes for when doing make up!
Hope this helps!
xx

Jul 1, 2011

one hundred & eight.

Reader Question:
"I have trouble finding nice powders or foundations that apply smoothly and evenly, do you have any suggestions for someone who is ridiculously pale? 
The last one I bought was the perfect colour but looked really obviously cakey on my skin."

YES! I have a solution for you!
The trick is in the combo of foundations & powders you're applying.

I personally don't love matte skin, 
so I would only be using powder on the areas of your face that get very shiny.  
Or
Invest in some blot paper & avoid the powder altogether!
I can imagine you saying...
 "What on earth is BLOT PAPER??"
It's a really lightweight paper that comes in cute pocket sized packs, which you pat your face with & it  removes the oil that's there!
You can try finding some at your local make up store.. 
Or look on ebay or scottysmakeup for some!

If you decide you want to stick with the powder,  then buy a loose, translucent powder.
L'oreal make a great loose powder called 'Translucide, naturally luminous powder'
& it even has vitamin C in it!

If you've been using a pressed powder, they can be thicker than wearing a foundation, so if you're combining the two,  you can only imagine how "cakey" that would look! 
  

As for the foundation,
I know it can be horribly hard to find pale colours especially in cheaper brands.
(I feel your pain, without fake tan i have fluorescent white skin myself!)  
You may have to splurge out a bit to find a colour that matches you, that has a smooth consistency. 

There are a few brands that i love that make lovely pale foundations...
It will depend on how much coverage you want as to which you would choose..

For light coverage:
MAC 'face & body' is a great foundation.
It only gives a small amount of coverage, say enough to even out skin tone, 
without covering scars or blemishes.
It's very lightweight & easy to wear with translucent powder as well.
You would probably be colours "C1" or "C2"

For medium coverage:
I know I don't shut up about Giorgio Armani 'Silk Luminous foundation',
but that's only because it is truly one of the BEST products out there. 
It gives good coverage but is no where near "cakey". 
It blends perfectly & will look fine with the powder i recommended over the top.
I'm not sure exactly what colour you would be without seeing you but possibly a 3.5 or lighter. 

For heavy coverage:
Shu Uemura 'Face architect' foundation also comes in pale colours.
However, it's a much thicker consistency with a lot more coverage.
Still a great product, but it may be too thick for your liking.

If you feel like you need more coverage than the light- medium coverage foundations,
you should try YSl's 'Touche Eclat' concealer in number 2.
 It will blend in beautifully with either foundation!

One other thing to keep in mind for your pale skin..
A lot of places will probably try selling you pink based foundations because of how fair you are.
Try your very best to avoid them & opt for a yellow based foundation instead.
It will make you look a healthier version of pale 
& you're more likely to find a colour that matches really well. 

All the colours i have recommended are yellow based & probably always will be!

Hope this helps!
x
 

one hundred & seven.

 Reader Question:
"How does a blonde do a smokey dark eye without it looking to full on? 
What colours are best to use?" 


For a smokey eye that isn't too full on I would say this is my favourite look:

Take note: I did this a little heavier than usual so it would show up well in the photo! 

It's also quite simple to achieve.

After prepping your eyelids,
(With foundation, followed by concealer & then a translucent powder.)

Apply a beautiful natural shimmery colour powder to your eyelids 
( I love MAC Mineralize Skinfinish in 'Soft and Gentle') 
& the inner V corners of your eyes to highlight.
If you don't want a shimmery powder on your eyelids just leave the translucent powder that you applied after your concealer.  Still do the inner corners of your eyes though!

Follow that up with some heavy black eyeliner on the inner rim of your eyes, top & bottom!
(I would use MAC gel eyeliner in 'Blacktrack')

Then get a black eyeshadow 
(& a smaller eyeshadow brush)
& smudge it all along your top lash line, creating a blended black line above your lashes.
Use the same eyeshadow & darken the outer V of your eyes, top & bottom.
If you feel that's too heavy you can leave out the smudging all the way along the lashline & just smudge the outer V instead. Just make sure you blend the black into your eyelashes so there are no harsh lines showing!

Curl your lashes, apply plenty of black mascara & you're done!


I have another option for you as well which I wear on an almost every day basis.
It's not quite a "smokey" eye but definitely a great look that isn't too full on, 
yet you still feel like you're eyes are strong enough to wear on a night out!

As i did in this picture.. 
Please note: this eye make up i am about to teach you, 
will not make you scrunch your face up or look as stupid as i do in this photo.
That was my own doing.
;)

The process is quite similar to the first look

Prep your eylids.
Apply the shimmery eyeshadow... or not. Again, It's up to you!
Do highlight the inner corners of your eyes with the shimmery shadow though!

Again, apply lots of black eyeliner to the inner rims of your eyes.

Then apply a taupe eyeshadow on your eyelids
Apply it all over your entire eyelid if you skipped the shimmer powder step 
& only apply along your lashline if you did apply the shimmer powder to your eyelid.
(I use L'oreal ColourAppeal in '46 Crystal Brown')

Use the same colour & apply along the bottom lashline as well.

Curl your lashes & load them up with mascara & you've completed another great look!

Hope you love at least one of these looks!

one hundred & six.

If you happen to have any make up or hair styling questions

Send me an email on rachael_brook@mac.com

& I will send you a reply via this blog

=)